RS FORM from RS Joomla is a powerful extension form builder with many extra and underrated features. In this article, we will explore some of these features, from using Google Docs and Google Sheets to using the inbuilt .PDF solution in RS Form.
Having a form on your website gives visitors an easy way to get in touch with you, and you can streamline how the visitor gives you the information. You can download RS Form Pro from RS Joomla's website.
Install RS Form
Before you start, it is important to install the "RS Form Pro" Component and the "Plugin - Google Sheets," which you bought on RS Joomla's website.
Below is the information on how to install it in Joomla 5:
Learn how to install an Extension in Joomla 5
How to Install an extension in Joomla 5
To install extensions and activate plugins in Joomla 5, follow these steps:
-
Download the Extension:
- Download the extension (plugin, module, or component) to your local machine as a
.zipfile package.
- Download the extension (plugin, module, or component) to your local machine as a
-
Access the Joomla Backend:
- Log into your Joomla Dashboard (Administrator).
-
Install the Extension:
- From the Backend, select Extensions → Install/Uninstall.
- Click the Browse button and select the extension package on your local machine.
- Click the Upload File & Install button.
-
Enable the Plugin:
- After installation, go to Extensions → Plug-In Manager.
- Use the Filter feature to find your plugin, and then click on the plugin in the list below.
- On the Plug-in Manager page, set Status to Enabled, configure any other settings available with the plugin, and then click Save & Close.
Here is a detailed guide from the Joomla documentation:
-
Installing an Extension:
- Download the extension to your local machine as a
.zipfile package. - From the Backend of your Joomla site (Administrator), select Extensions → Install/Uninstall.
- Click the Browse button and select the extension package on your local machine.
- Click the Upload File & Install button.
- Download the extension to your local machine as a
-
Enabling a Plugin:
- Go to Extensions → Plug-In Manager.
- Use the Filter feature to find your plugin, and then click on the plugin in the list below.
- On the Plug-in Manager page, set Status to Enabled, configure any other settings available with the plugin, and then click Save & Close.
By following these steps, you should be able to install and activate extensions and plugins in Joomla 5.
The use of Google Docs and Google Sheets to gather the information from RS Form submissions
It is quite easy to gather submissions from RS Form using a Google Sheet, you must have an Google Workspace account, and the RS Form plugin Plugin - Google Sheets. The plugin can also reduce the risk of generating spam since you may eliminate admin emails.
01. Connecting to Google Sheets
- Login to Google Develop Console
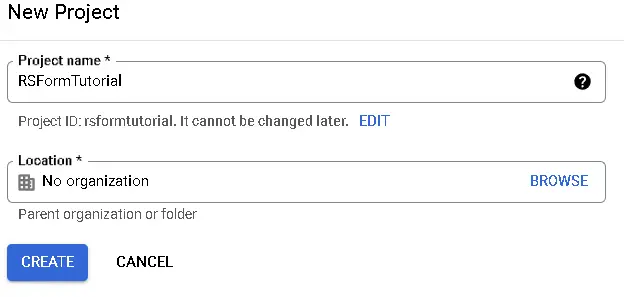
- If you don't have any project before, click the "Create" button on top. If you have used it before, click the dropdown box to the left of the search bar.
- In the dashboard search for "Google Sheets API"
- If API not enabled, click "Enable API and Services"
- On the left side, click "Credentials"
- Click on "Configure Concent Screen"
- Enter the APP information and click "Save and Continue"
- Now you need to create the Credentials, click on "Create Credentials" and select the "OAuth client ID"
- Select "Web Application" and add a name.
- Within the "Authorized JavaScript orgins" add your website url, like
https://www.website.com. If you are usinglocalhost, you can leave it blank
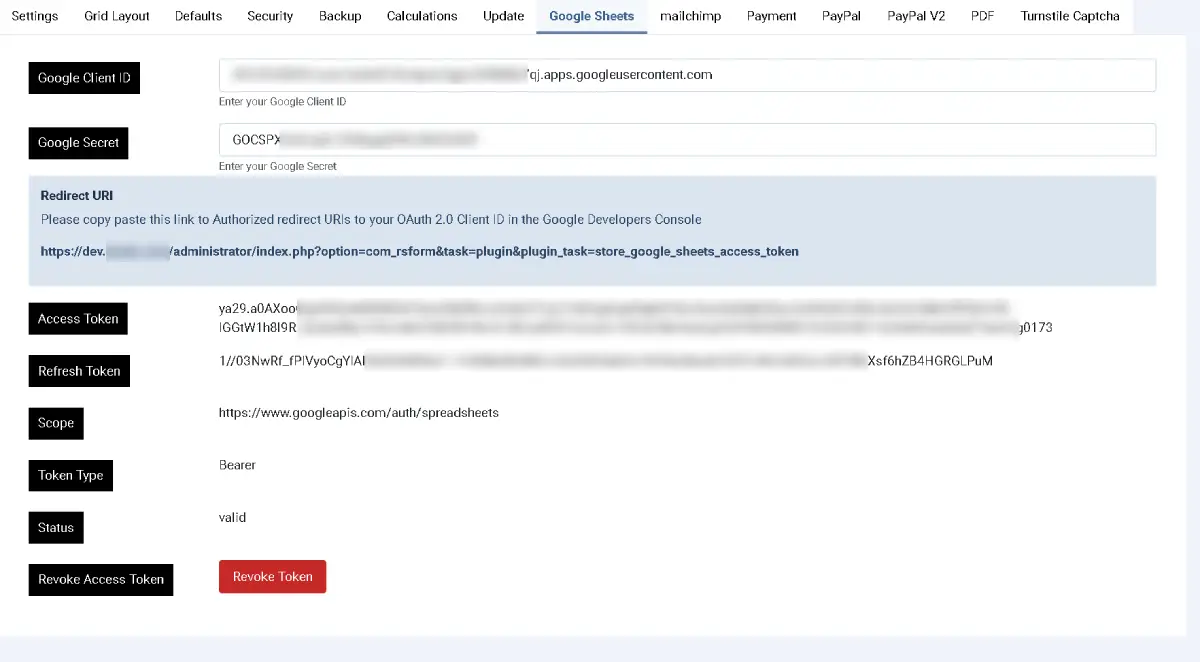
- Within the RS Form Configuration, on Joomla Administrator go to
Components>RSForm Pro>Configuration>Google Sheetsand copy the "Redirect URI" into the "Authorized redirect URIs".
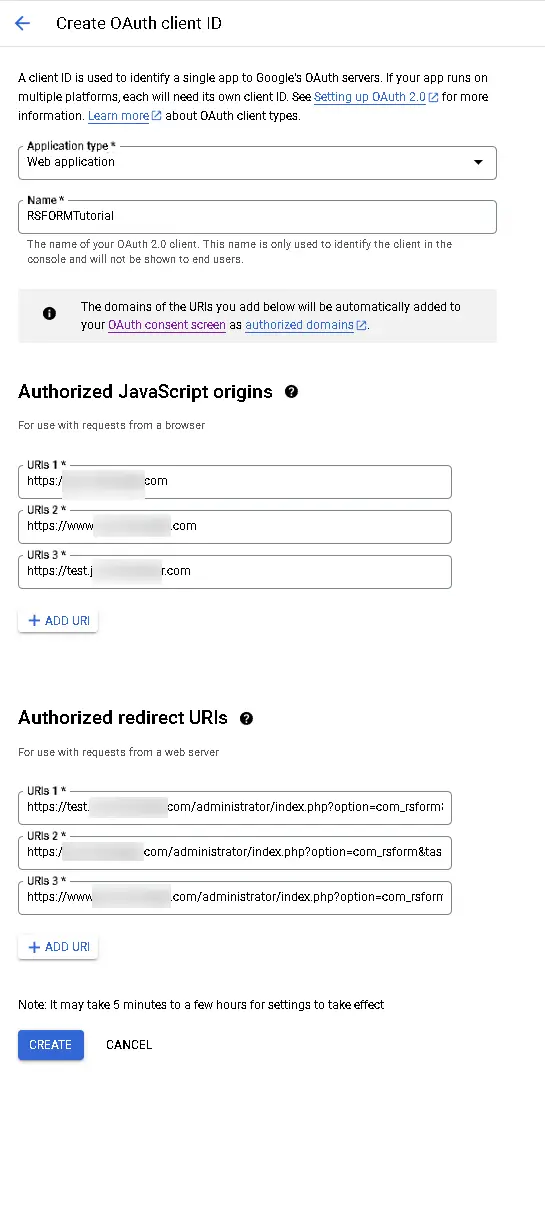
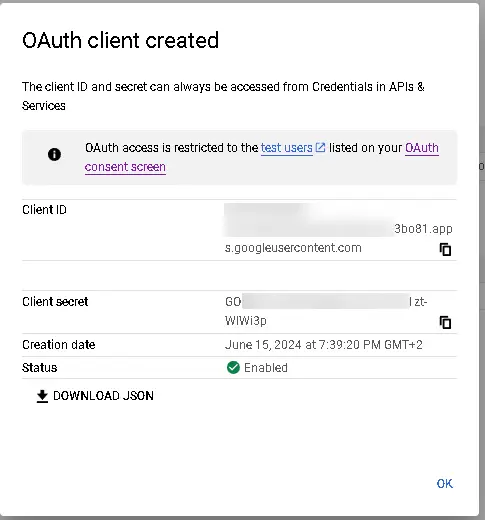
- Click "Create", and the API keys will be created.
- Within the RS Form Configuration, on Joomla Administrator go to
Components>RSForm Pro>Configuration>Google Sheets, locate the "Google Client ID", and the "Google Secret" and add the values from the API keys
Ads from Bredc.com!
Joomla Forms - We build the forms for you
Form building, which can often feel like a daunting nightmare, is easy with Joomla and its extensions like RS Form. Fill out this form, and we will send you a proposal for a standout form!
- Click the big green button "Authorize", and authorize with the Google Account
- CON GRATULATION, You have connected the RS Form to Google
02. Create the Form in RS Form
Creating a form in RSForm Pro for Joomla involves several steps. Here's a step-by-step guide to help you get started:
Install and Activate RSForm Pro:
- Ensure you have RSForm Pro installed and activated on your Joomla site. If not, download and install it from the RSJoomla website.
- Go to your Joomla backend, navigate to Extensions > Manage, and ensure RSForm Pro is listed and enabled.
Create a New Form:
- Log in to your Joomla backend.
- Navigate to Components > RSForm Pro.
- Click on the Forms tab.
- Click the New button to create a new form.
Form Settings:
- Form Name: Enter a name for your form (e.g., "Contact Form").
- Form Description: Optionally, add a brief description of the form.
- Form Layout: Choose a layout for your form (e.g., "Single Column").
- Form Theme: Select a theme for your form (e.g., "Default").
- Click Save to save the form settings.
Add Form Fields:
- Click on the Fields tab.
- Click the New button to add a new field.
- Field Type: Choose the type of field you want to add (e.g., "Text", "Email", "Checkbox", etc.).
- Field Label: Enter a label for the field (e.g., "Name").
- Field Name: Enter a unique name for the field (e.g., "name").
- Field Size: Optionally, set the size of the field.
- Required: Check the box if the field is required.
- Click Save to save the field.
Add Multiple Fields:
- Repeat step 4 to add more fields to your form. For example, you might add fields for email, phone number, and message.
Form Actions:
- Click on the Actions tab.
- Click the New button to add a new action.
- Action Type: Choose the type of action (e.g., "Send Email").
- Action Settings: Configure the action settings. For example, if you chose "Send Email", you'll need to set the recipient email address, subject, and email body.
- Click Save to save the action.
Publish the Form:
- Click on the Publish tab.
- Form Status: Set the form status to Published.
- Form Access: Choose the access level for the form (e.g., Public).
- Click Save to save the publish settings.
Add the Form to a Page:
- Create a new article or edit an existing one where you want to display the form.
- Click the RSForm Pro button in the editor toolbar.
- Select the form you created from the list.
- Click Insert to insert the form into the article.
Save and Preview:
- Save the article.
- Preview the article to see the form in action.
That's it You've successfully created and published a form using RSForm Pro in Joomla.
03. Create a Google Spreadsheet
Go to Google Spreadsheet and create a spreadsheet, add the headings that you want to extract from the RS Form submission, in row 1.
04. Connect your fields to the Google Sheet
Now we have added the RS Form to Google Developer Console, now we need to add the form to the actual Sheet.
Select the form you want to use, from the Joomla Administrator go to Components > RSForm Pro > Manage Forms, and click
- On the left, select "Google Sheets"
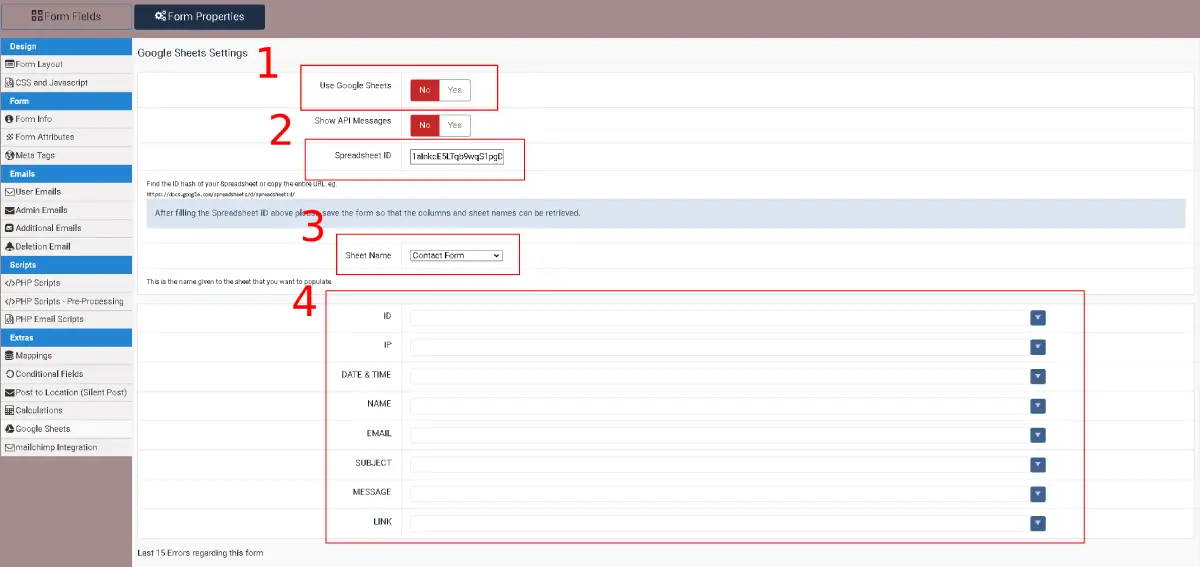
- First you need to activate the Form for sending to Google Sheets, toggle "Use Google Sheets" to On, and save the Form.
- Find your Google Spreadsheet ID
- Select your "Sheet Name" from the dropdown field
- Here you assign the different fields to your Google Sheet Headers witch you created earlier.
Combine your Google Sheet to generate Documents from your submissions in the RS Form
Create a folder within your Google Drive and create a Document template, like this: https://docs.google.com/document/d/1ZHIFSi65k8a3yLuVUHZ58GR4iJ-FZgK0A1CM0MXDl7U/edit?usp=sharing
Let us start creating the script for the Google Sheet
Now we are going to use "App Script to generate a document from the submissions done in the form
First we must create a menu item for generating the "Contact Submission" document from the template.
	function onOpen() {
		//First we create a Menu for the script to run
		const ui = SpreadsheetApp.getUi();
		const menu = ui.createMenu("AutoFill Docs");
		menu.addItem("Create New Contact Submission", "createNewGoogleDocs");
		menu.addToUi();
	}
Now we get the template document by its id.
	function createNewGoogleDocs() {
		//This value should be the id of your document template that we created in the last step
		const googleDocTemplate = DriveApp.getFileById(
			"1ZHIFSi65k8a3yLuVUHZ58GR4iJ-FZgK0A1CM0MXDl7U"
		);
Here we set the id of the folder where we want to store the finished "Contact Submission" for each submission.
	//This value should be the id of the folder where you want your completed documents stored
	const destinationFolder = DriveApp.getFolderById(
		"1C9IID4DfjKt8udItBJeve524gSEZtgDv"
	);
Now we use the sheet name, and store it as a variable
	//Here we store the sheet as a variable
	const sheet =
		SpreadsheetApp.getActiveSpreadsheet().getSheetByName("RSForm Tutorial");
This gets all values in an 2D array
	//Now we get all of the values as a 2D array
	const rows = sheet.getDataRange().getValues();
Now we need to start processing each spreadsheet row
We check if the spreadsheet contains headers
We use column 7 as a guide for showing that this row has already been processed, and we will create a document link in this column
	//Start processing each spreadsheet row
	rows.forEach(function (row, index) {
		//Here we check if this row is the headers, if so we skip it
		if (index === 0) return;
		//Here we check if a document has already been generated by looking at 'Document Link', if so we skip it
		if (row[7]) return;
Now we need to create a new document from the template, and store it under a new name in our destination folder.
	//Using the row data in a template literal, we make a copy of our template document in our destinationFolder
		const copy = googleDocTemplate.makeCopy(
			`Contact Submission, ${row[0]}`,
			destinationFolder
		);
Now we are ready to use the tags as we created in the document template
	//Once we have the copy, we then open it using the DocumentApp
		const doc = DocumentApp.openById(copy.getId());
		//All of the content lives in the body, so we get that for editing
		const body = doc.getBody();
We sanitize the date for correct display, and store it in a variable
	//In this line we do some friendly date formatting, that may or may not work for you locale
		const friendlyDate = new Date(row[1]).toLocaleDateString();
Now we write all the tags, corresponding to the row number of our spreadsheet
	//In these lines, we replace our replacement tokens with values from our spreadsheet row
	body.replaceText("{{ID}}", row[0]);
	body.replaceText("{{DATE}}", friendlyDate);
	body.replaceText("{{NAME}}", row[2]);
	body.replaceText("{{EMAIL}}", row[3]);
	body.replaceText("{{SUBJECT}}", row[3]);
	body.replaceText("{{MESSAGE}}", row[3]);
We save and closes the document.
	//We make our changes permanent by saving and closing the document
		doc.saveAndClose();
We store the URL to the document in a variable, and output it in the spreadsheet
	//Store the url of our new document in a variable
		const url = doc.getUrl();
		//Write that value back to the 'Document Link' column in the spreadsheet.
		sheet.getRange(index + 1, 7).setValue(url);
We close the script
	});
}
Saving and authorizing the use of the APP Script
It is now time to save the APP Script and deploy our Application, at the top CLICK THE "Save"-icon

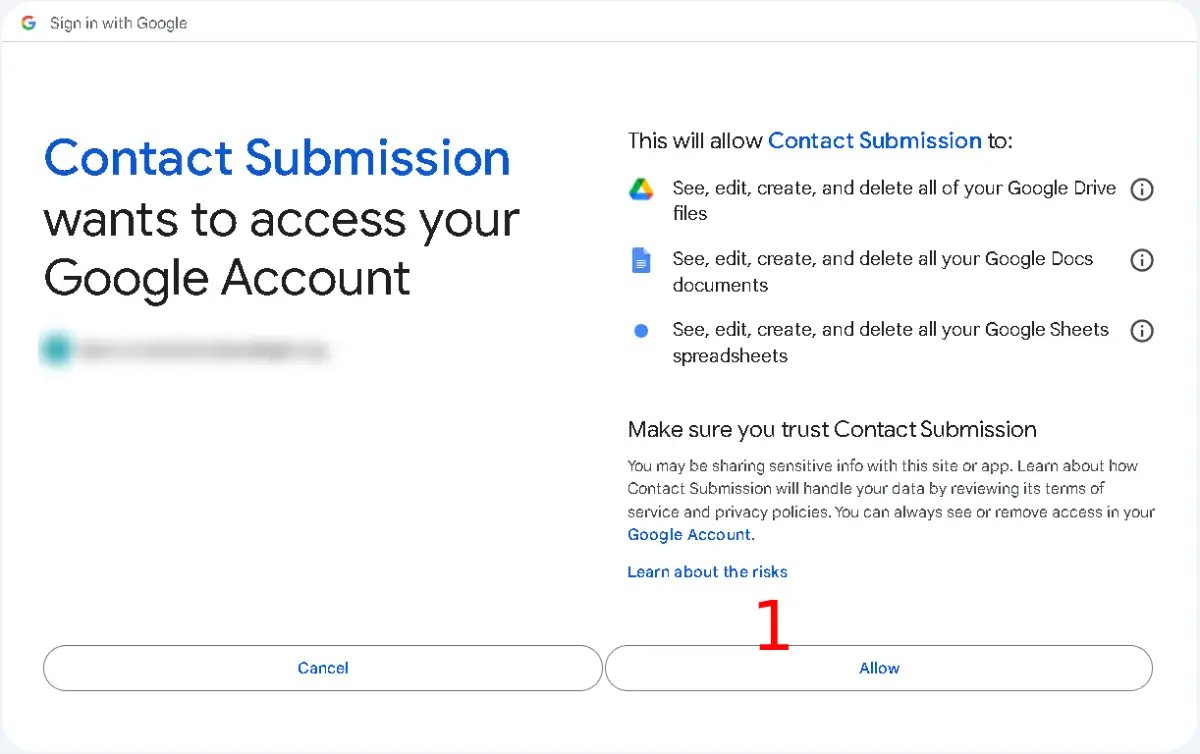
You will get an box for authorizing the script to be rum, like this:
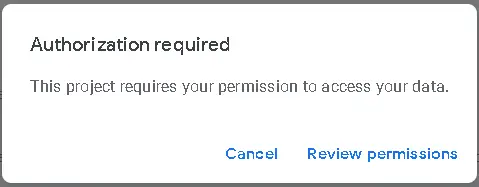
Grant authorizing, by clicking on "Allow" on the next screen
Go back to your spreadsheet and refresh the page, now the menu "AutoFill Docs" on top will appear, and in it the menu "Create New Contact Submission" for creating the document.
Click this menu
Now Go to your folder where the "Submissions" where to be stored, you will then see the new document. Here is the result of one submission https://docs.google.com/document/d/1VAPH5pRqkyoPOXWpf6Z0UGg7WexQ-TcM4NNYTxS207s/edit.
Remember to TEST your Form before deployment!

- LET ME KNOW IF YOU KNOW ANY OTHER WAYS TO DO THIS IN THE COMMENTS BELOW -

Add comment